The Old Visuals
If you have visited this page in the past few months, you might have seen the old state of this page.
Basically it was a okay-looking page with a Catppuccin theme applied to it.
Overall it looked something like this:
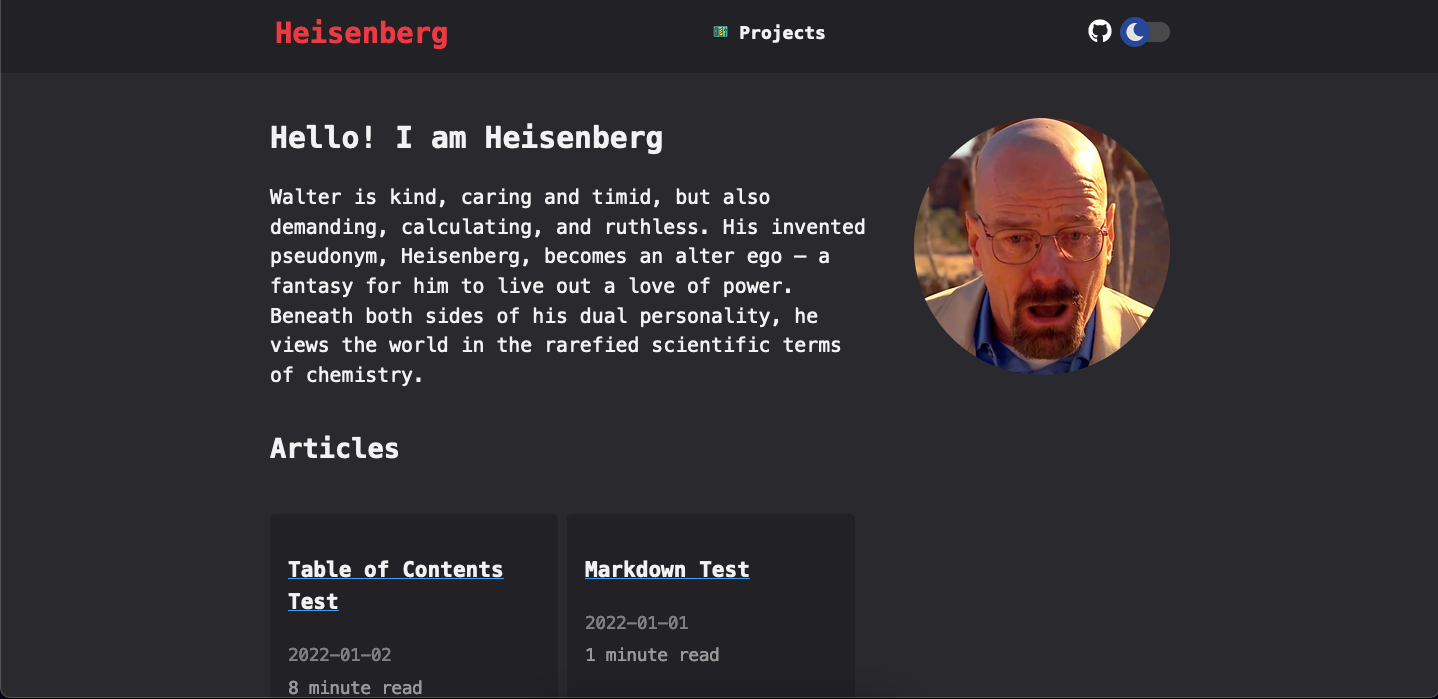 even though I
heavily modified it (The image has been copied from the
shadharon Zola theme).
Yes, I don’t have an original picture of it since I nuked the git history.
What is Zola?
Zola is an open-source, fast, and simple static site generator built using Rust. It’s designed to be easy to use, yet powerful enough to handle complex projects.
The Problems
There were several problems with the old website.
- Ugly code blocks: Code blocks were poorly formatted and did not use a “single” color scheme. I tried manually modifying it to resemble the Catppuccin theme, but I failed miserably. In the end it just looked like someone tried out CSS for the first time.
- No search bar: Yes, the old website design had no functional search bar (The theme includes one, but it does not work for me, and it just doesn’t look good).
- No archive / structuring by time: The old website also did not allow for someone to search for a post which was e.g. released in December 2023.
- Inconsistent spacing: The old website had spacing issues, especially with the dark/light theme toggle. On mobile it was in the wrong location and generally the dynamic resizing of the website was not good.
- Inconsistent and, in my opinion, unattractive design: The overall design (after I messed with it, created custom JS scripts etc.) was just ugly, in my opinion.
Engine problems:
(My engine of choice for creating the blog page was Zola)
- Smaller community: Zola, since it is a newer project, also has a way smaller community. This means that there is less support and fewer themes available.
Important
Me saying that the theme had X and Y problems, does not mean that the theme is bad. It just has some problems for me. This does not mean that it is bad for everybody, and I heavily respect the creator of the theme for putting in so much work to create something like this.
Why Did I Choose Zola?
The answer is pretty simple: I like Rust and useless recodes of software.
So basically my decision went something like this: “I want to build a blog. Oh, there is a tool written in Rust?” and that’s the decision done.
Why not Switch to Another Theme from Zola?
To be honest (when I started using Zola) there were only a few themes available. So when I encountered these issues I was certain that I need to change the entire engine. So I just started looking for alternatives, not alternative themes.
Since I have taken a look at their theme library today I can confidently say: There are a lot of new themes available and it would maybe even work out for me. But since I’ve already switched (more on that soon), I am not going back.
The Solution
My idea was simple. Switch to another static site generator (SSG). But which one? My decision was quick: Hugo.
What is Hugo?
Hugo is an open-source, fast, and intuitive static site generator built using Go. It’s designed to be easy to use, yet powerful enough to handle complex projects.
Hugo Vs Zola
Performance
- Hugo: Built using Go, Hugo is known for its incredible speed and efficiency.
- Zola: Built using Rust, Zola also delivers impressive performance.
Both of them are made for performance and can easily manage complex projects.
Customization Options
- Hugo: Offers a wide range of customization options through various template engines (Go Template, HTML, and CSS) and external plugins.
- Zola: Also provides flexibility in terms of templating engines (Liquid, Tera, and Handlebars), but its Rust-based architecture might limit the availability of certain third-party plugins.
While both SSGs can be customized to meet specific needs, Hugo’s Go-based engine makes it more flexible.
Community Support
- Hugo: Backed by an active community with extensive documentation, numerous resources, and a large collection of themes and templates.
- Zola: Also has an active community, but its smaller size compared to Hugo means fewer resources are available for beginners.
Both SSGs have dedicated communities that provide valuable support. However, Hugo’s larger community might make it easier for new users to find help when needed.
Why Hugo?
Simply because it is the most widespread option available and therefore has the most themes and the biggest community.
Also the switch from Zola to Hugo is pretty easy since they both basically function in the same way: Take in markdown files and create a website from it.
Which Theme Did You Choose?
I went with the PaperMod theme (as you can see at the bottom of the page as well). I love the simplicity of it (especially compared to my old design, where everything had a different color) and the support, since it is one of the biggest themes.
The Switch
The initial switch went pretty smoothly and easily. After two attempts at
setting up the PaperMod theme
(since I am too silly to read
their documentation),
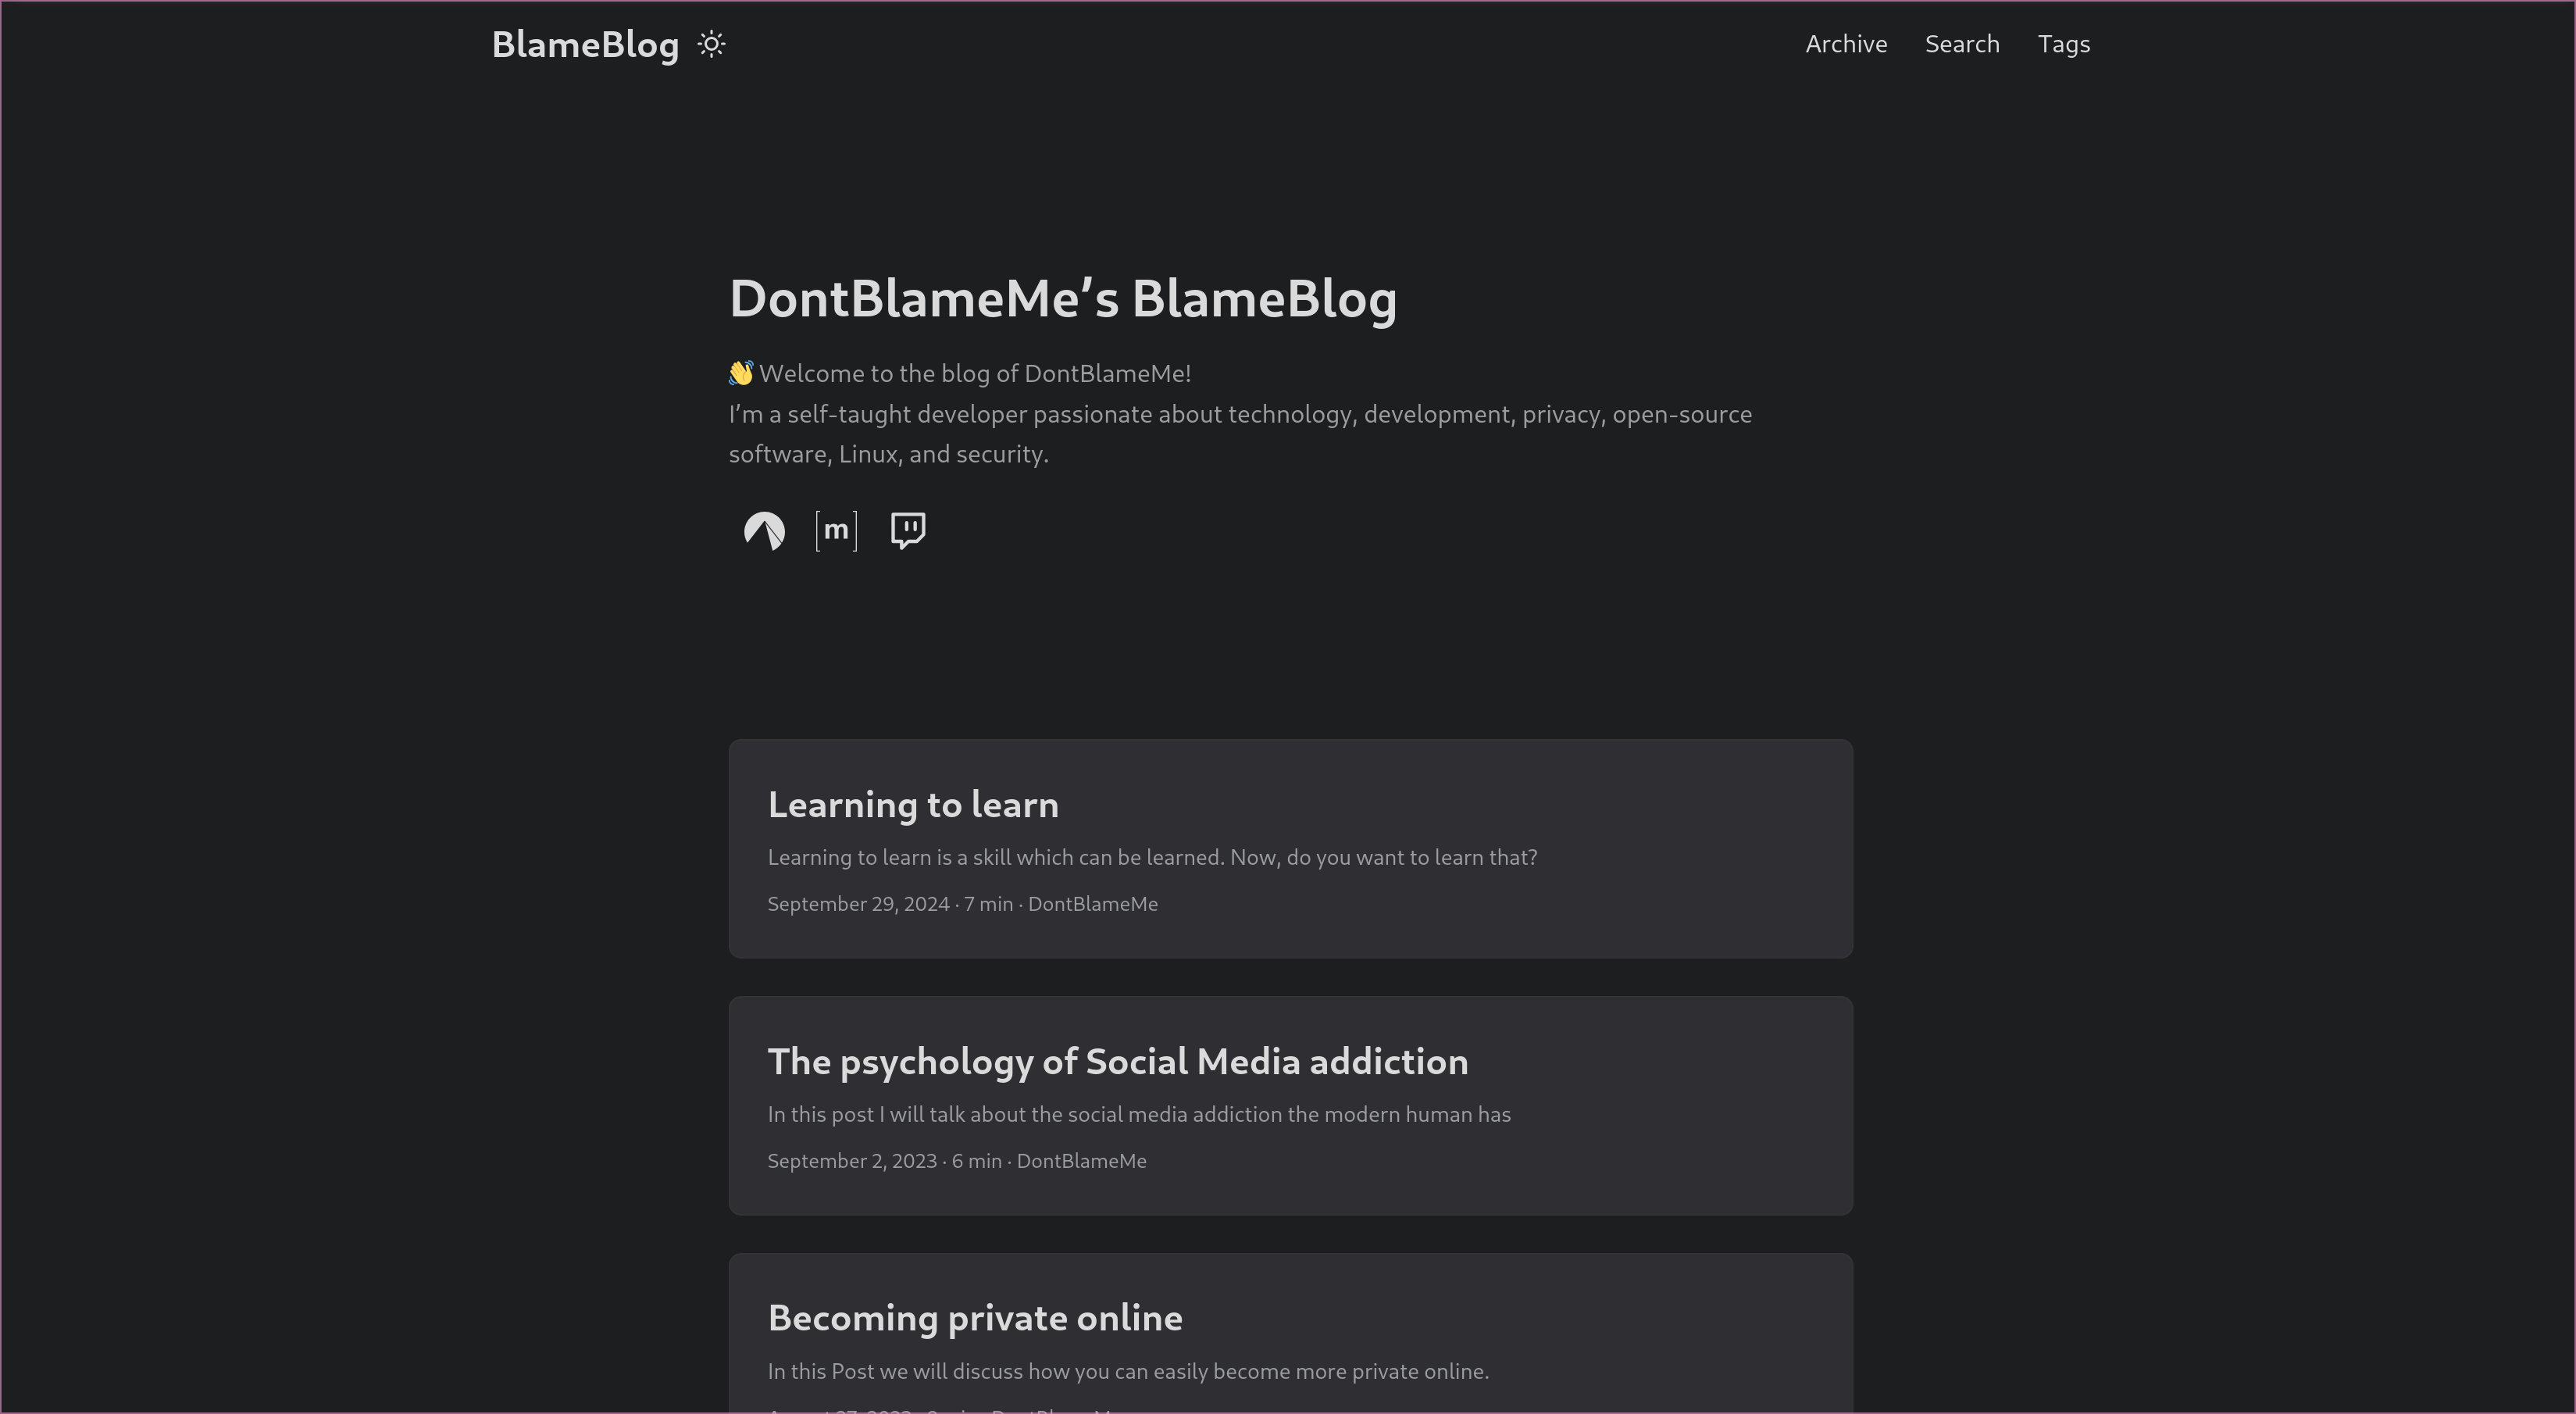
it worked flawlessly and looked gorgeous. It now looks like this:
Configuring the Theme
Configuring the theme went pretty smoothly as well. Inside the blog directory is
a config.yml file. Inside of this file you can easily change the entire
website’s config.
My Config
Here is my config, if you are someone who cares about it:
| |
But be warned: I might modify it in the future, and I will most definitely not update it here.
And that is it. I only had to modify the config file. No messing around with CSS or JavaScript like I had to previously (Yes, this also was fun, but I am happy that I no longer have to).
Moving the Blog Posts
This was the (by far) easiest part. Just copy the markdown files over and change the header to the syntax expected by the Hugo theme (this required 3 lines of change per file).
The new blogs now look even more awesome:
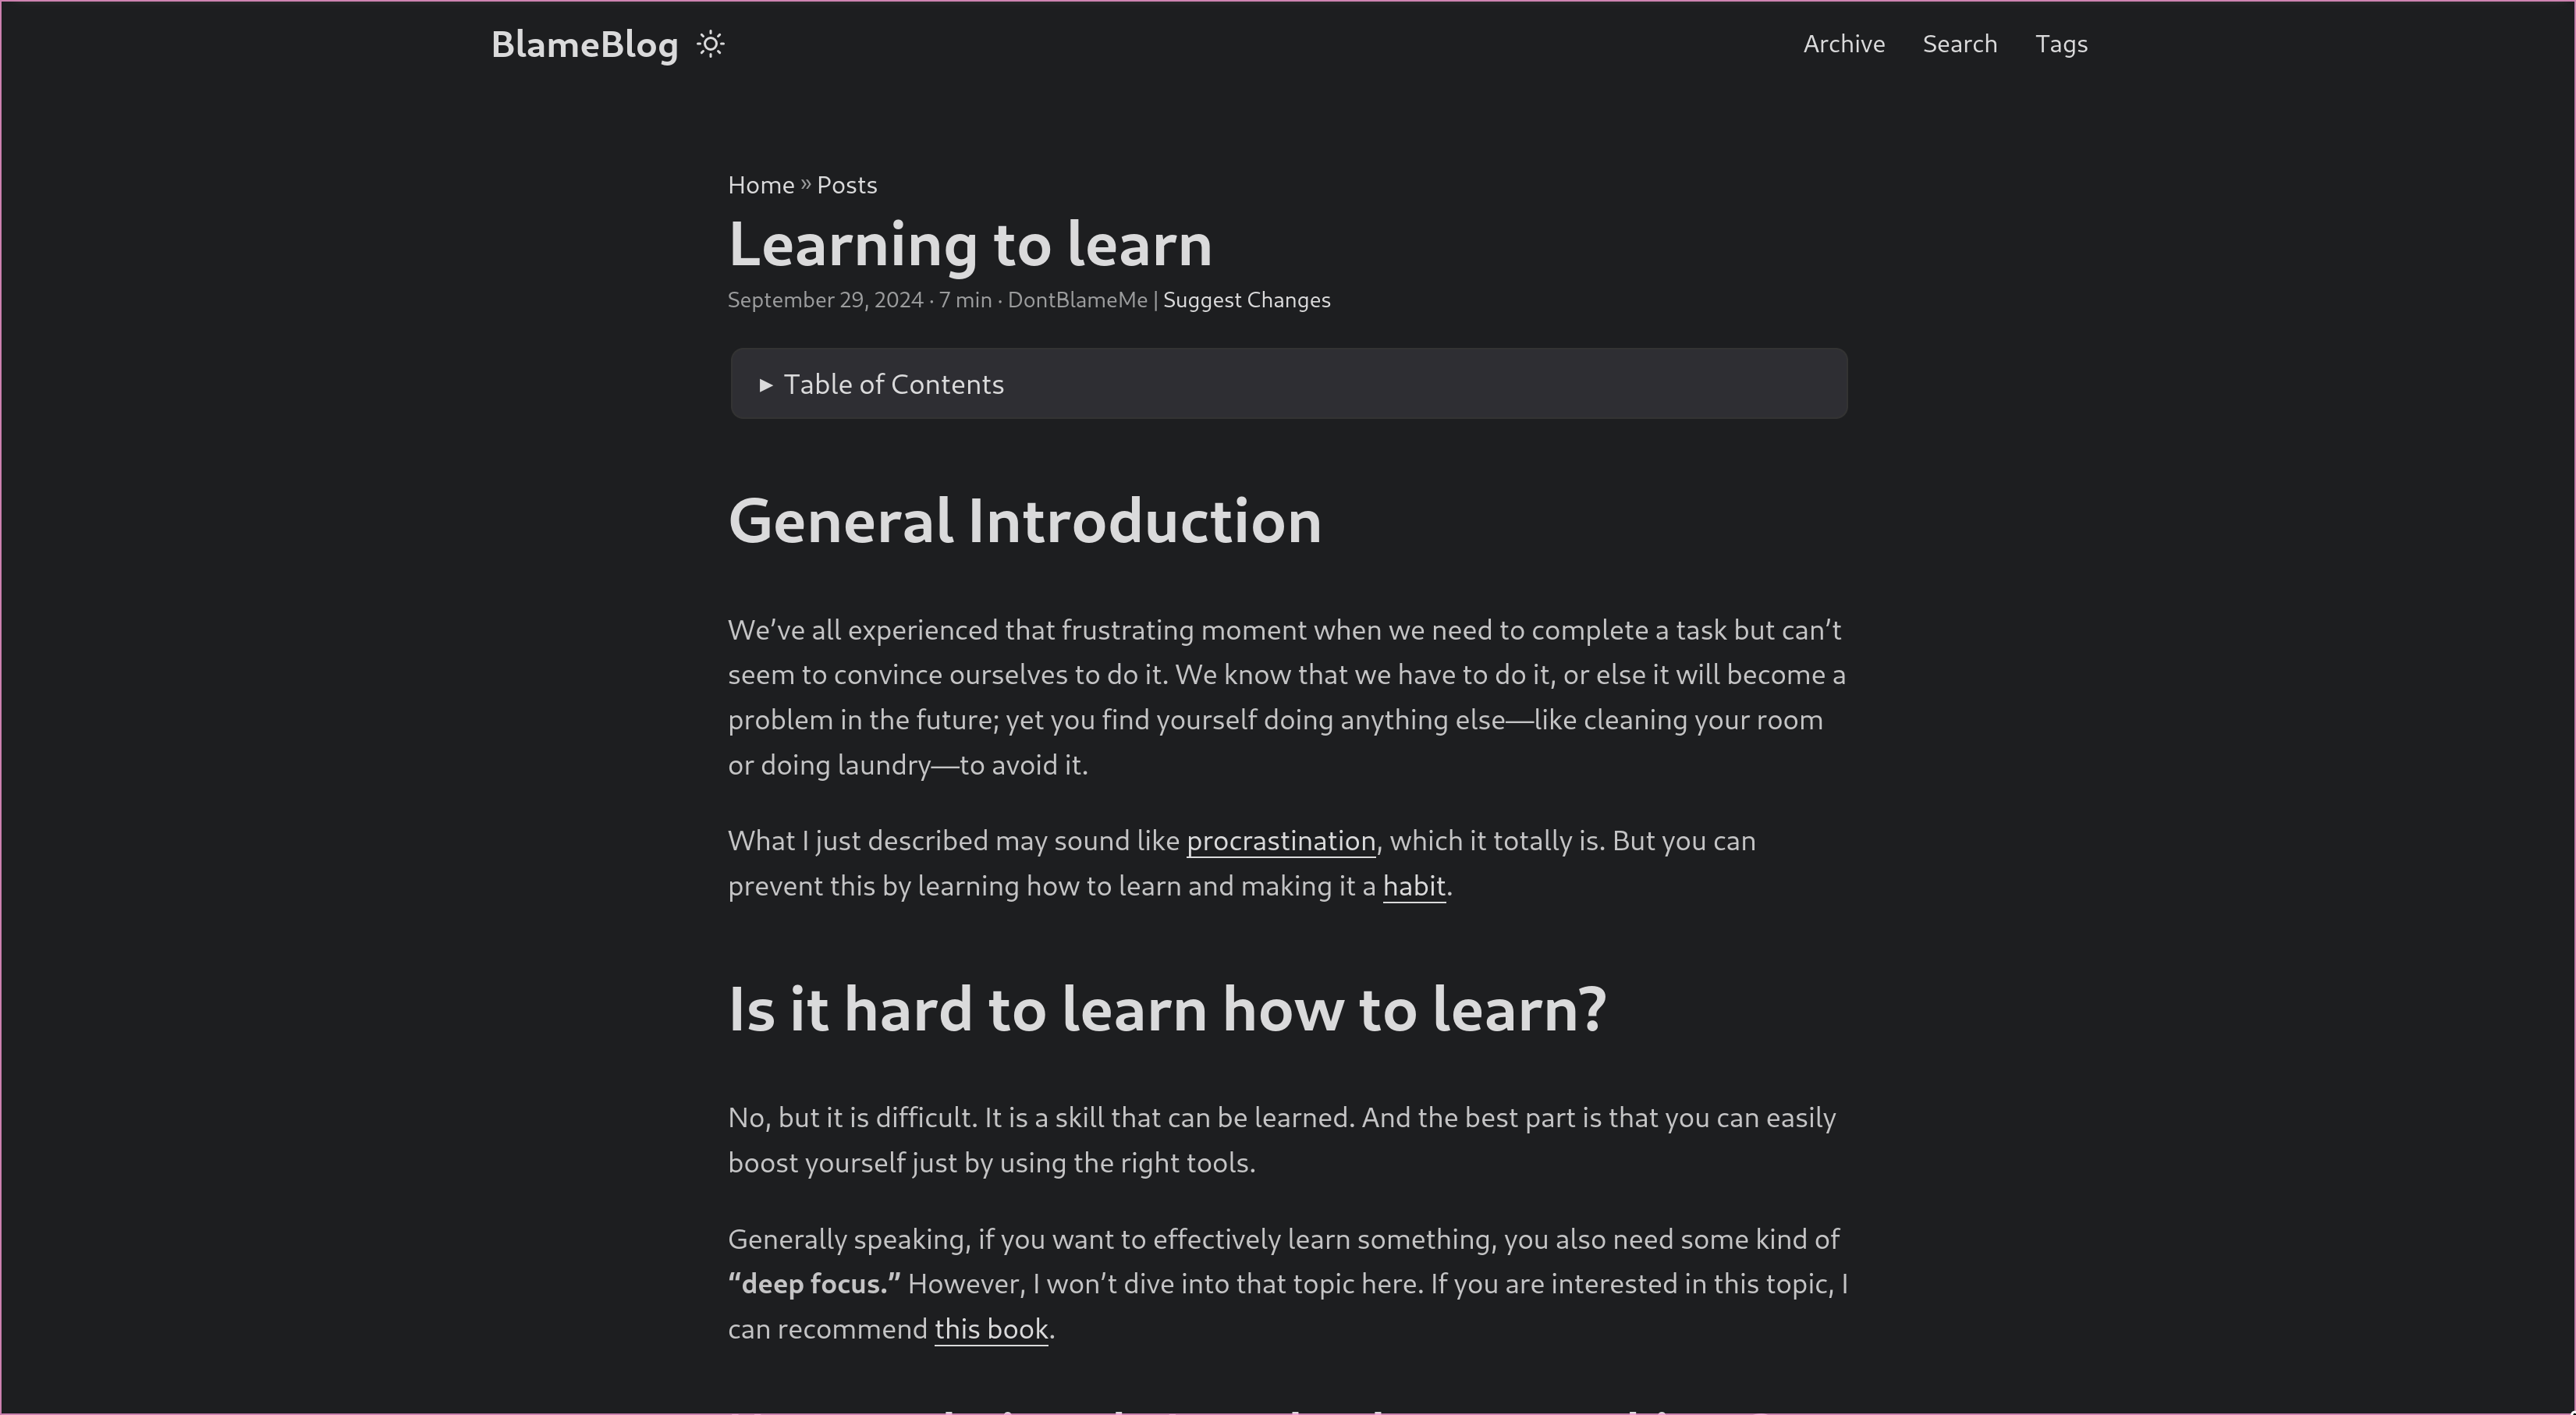
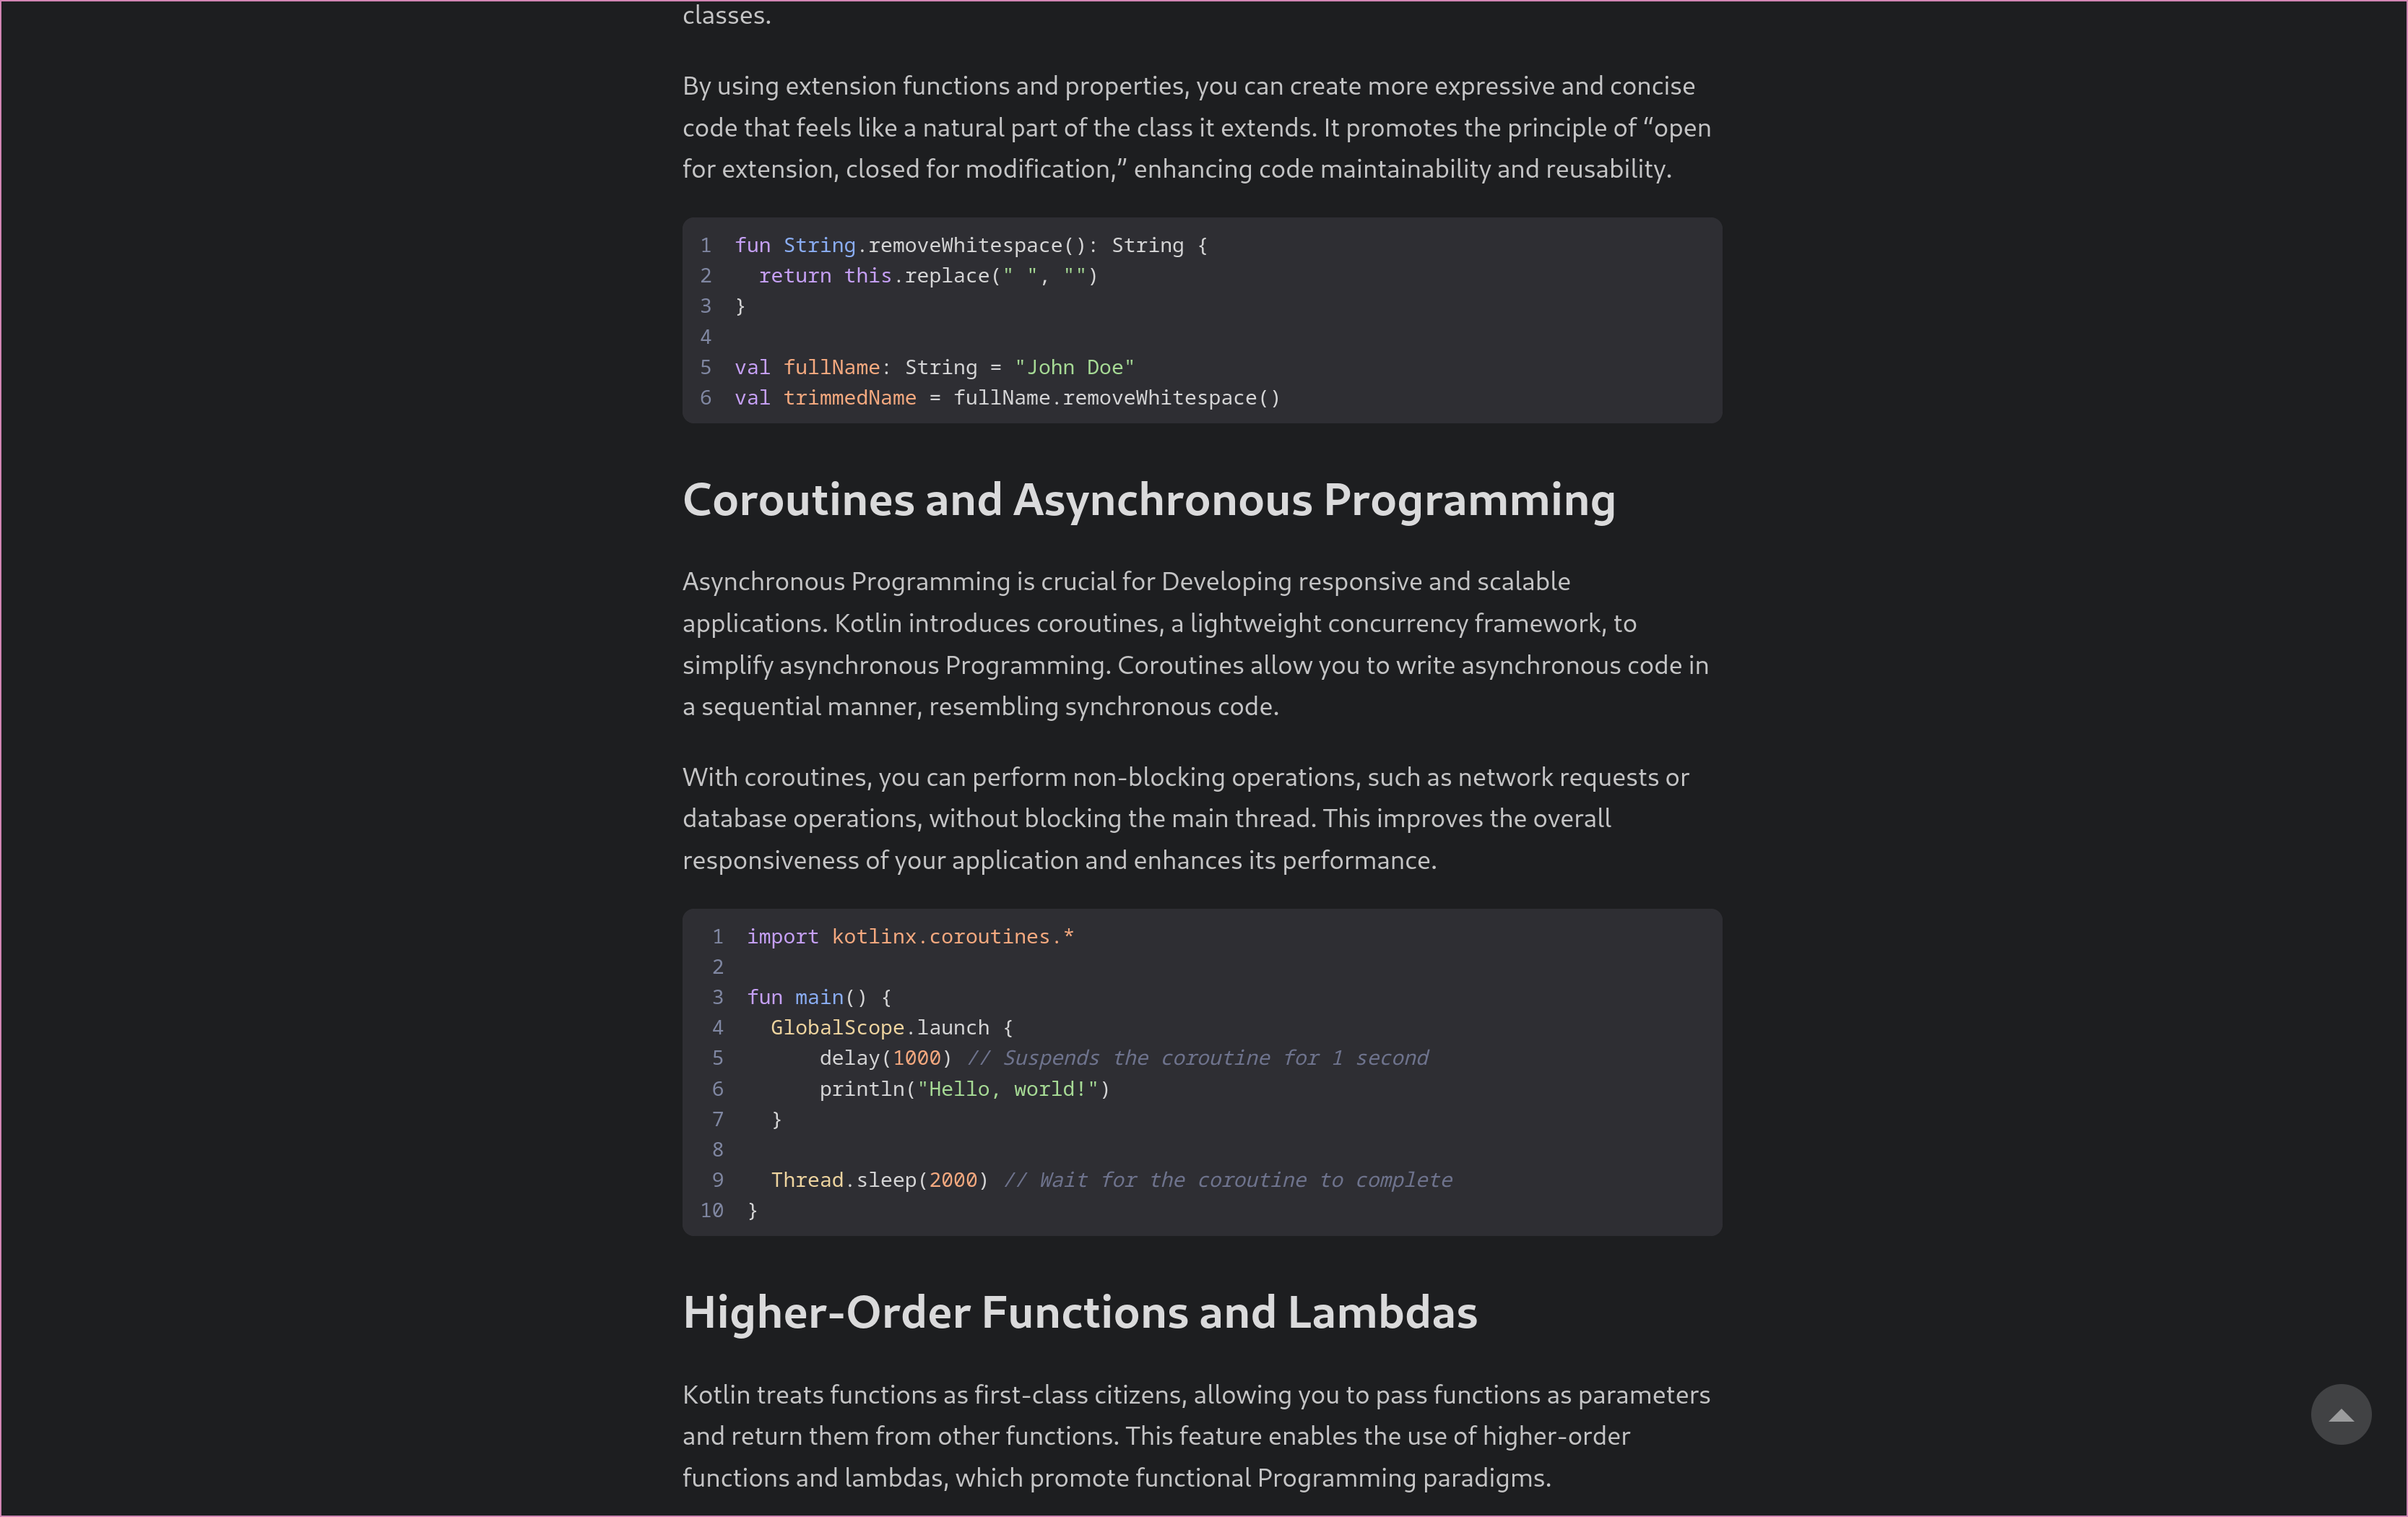
with code formatting also working perfect:
The Switch is Done?
Yes. Technically. But if you know me just a little bit, then you know that I love to configure the heck out of things, and also over complicate it (sometimes 🙃).
This led to the most fun part of it all. Let me explain.
Automating the Build Process
I just recently found out that Codeberg’s alternative to Github actions: Forgejo actions has finally some small servers free-to-use without having to self-host it.
So I thought: Why not automate the build process? And so I did. I created an action in my repository, which automatically built the page upon me adding something.
How did it do it? Create a file in the repositories .forgejo directory, like this:
| |
So basically it cloned the repository, built it and pushed it.
The Realization
At some point I realized something: Why the hell do I need to push it just for a worker to download it again and build it? I mean, shouldn’t it be possible to just build it and then push it?
And yes, this is easily possible. But I also want to provide the source code of my website. How could I do this?
Luckily, after some research, I found out about git subtrees. They basically allow me to publish a single folder as another branch on the same repository.
The Implementation
So I went to work. I thought about how I would want to implement this.
Setting up Git
Basically this is my blog directory:
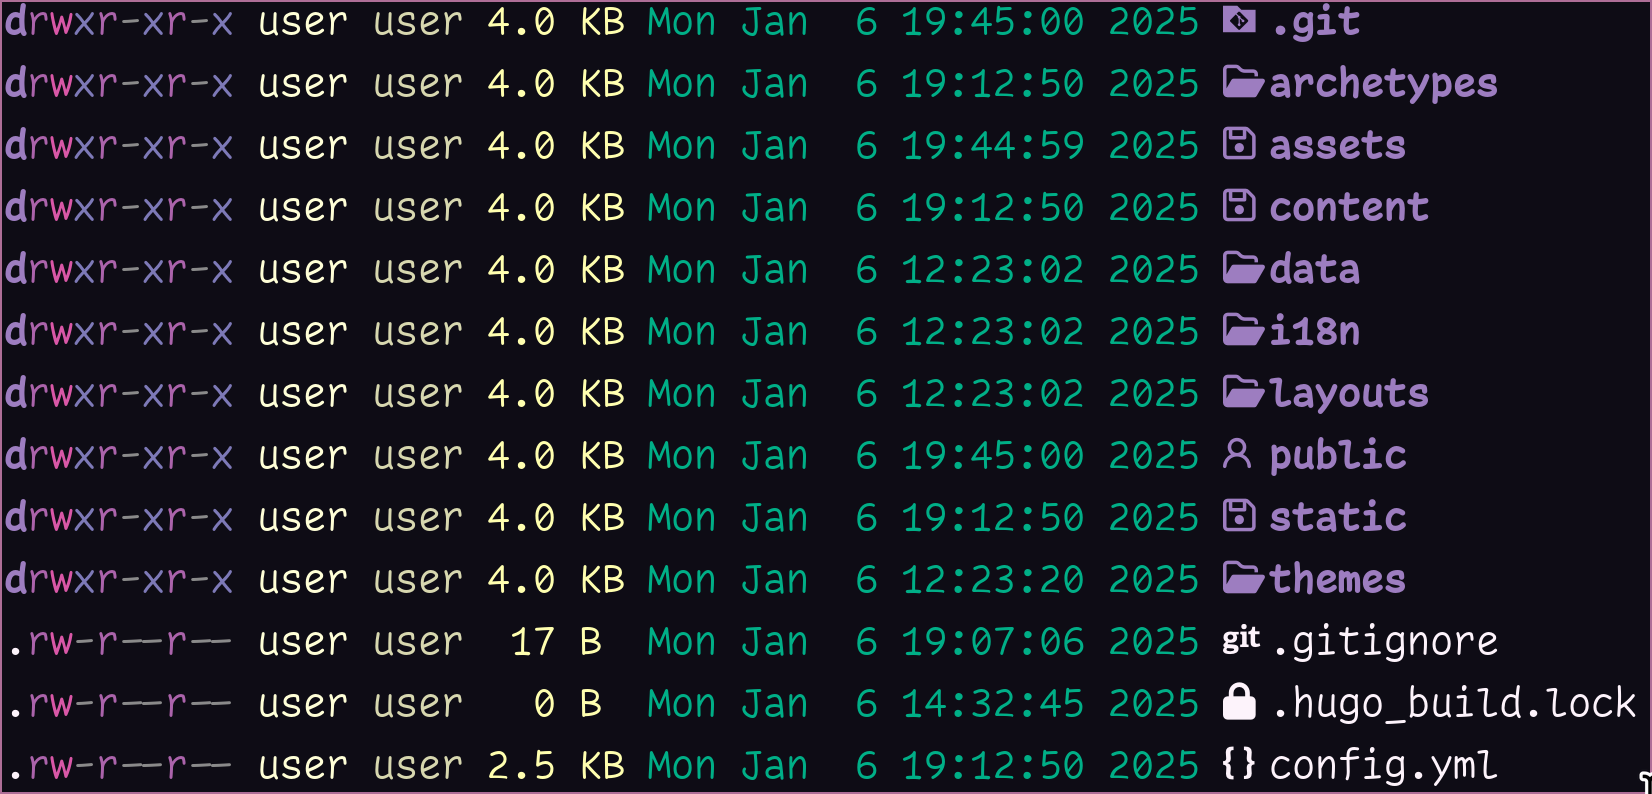
and the public directory is its own branch: master while the entire other
files are the src branch (source code of my website).
I achieved this with the following commands:
git subtree split --prefix public -b master(Split public into its ownmasterbranch)git subtree push origin master:master --force(Push the newly createdmasterbranch to master, using force to override everything)git branch -D master(Delete the local, now useless,masterbranch)
Now the separation between a src and a master branch was done, and I could
locally build it and push it (without having to waste resources running a worker
from Codeberg).
Using Logseq instead of an Editor
What is Logseq?
Logseq is an open-source, locally-hosted note-taking system that allows users to organize their thoughts, ideas, and knowledge in a structured and intuitive way. It’s designed for personal use, but can also be used as a team collaboration tool. I have written about it a little bit in this blog post.
Now this one is another big step. I would love to use Logseq, my PKM system of choice, for writing the blog posts instead of using Nvim (or any other editor).
The reason for this is simple: I have all my knowledge inside of Logseq and can therefore easily search up anything I need.
The Transformation Process
For me to being able to edit the blog posts in Logseq, I basically had to copy them over and then fix their formatting, since Logseq uses a different indentation/Markdown syntax than I previously did. This took quite some time (since I had to fix the indentation, formatting with lists etc.).
After that I also had to update the headers, so they match the Logseq formatting for the plugin (explained below). They now look like this:
| |
Installing a Plugin
12:08 The first step to achieve this system is to find a way of building Hugo compatible Markdown pages out of my Logseq blog entries.
This exact use-case is covered by the logseq-hugo-plugin (I am calling it logseq-hugo-plugin since it is called this way inside of Logseq. It’s repository is called logseq-schrodinger).
What Does the Plugin Do?
What it does it pretty simple. I press this button
 and a few seconds later (the plugin is relatively slow, sadly) I get an option
to save a
 publicExport.zip archive to my downloads folder.
Inside this folder you can find two sub folders. One contains the written blog posts (correctly formatted for Hugo) in markdown format, and the other contains the assets required by these blog posts.
The plugin also has some settings I have configured like this:
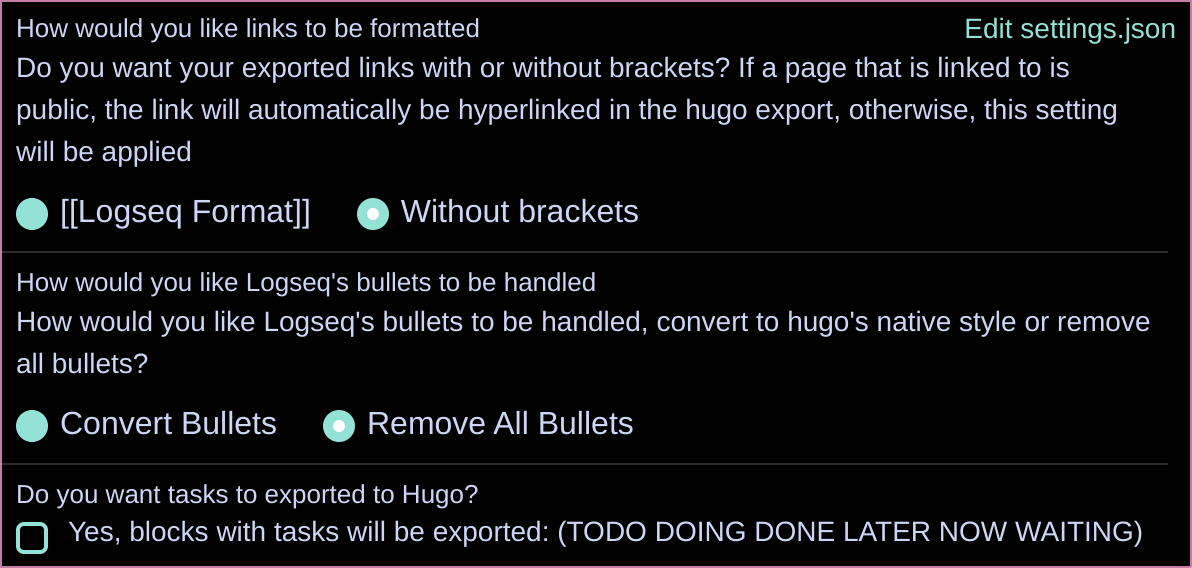
These settings basically define the behavior of the plugin, once exporting.
The Disadvantage
Writing in Logseq also has some disadvantages:
- I can’t use my beloved nvim bindings/shortcuts (Yes there is a vim shortcuts plugin, but you can’t easily modify it, and it also does not include everything I would need)
- Creating lists is not as straightforward. If I want a list I basically have to
write
- contentin Logseq (for numbered lists even 1. element, making sure Logseq does not convert it to its internal list). This not only looks stupid, but also goes against the “default formatting” in Logseq
Still an Annoying Workflow?
The workflow now was pretty simple: Write blog posts in Logseq and hit export. Wait for it to finish, extract the archive and move it inside the correct blog directories. Now try it out or directly commit it and publish it.
This was still too much work for me, so I created a script.
Automating (basically) Everything
Just so you understand - my current workflow is this:
- Write a blog post in Logseq
- Click the export button
- Run a script
and that’s it.
So yes, I have created a script which automates it even further. I made the script (since it is a one liner, because I use it as an alias) more readable and added explaining comments:
| |
This script now finally allows me to have my dream workflow. Write, click a button, run a script and its done.
Final Thoughts
Switching from Zola to Hugo) was not an easy process. It took me around eight hours to migrate everything (excluding writing this blog post).
Was it worth it, though? Yes it totally was. I am now using a way more popular static site generator, and using a theme where I have not messed with (and messed up) everything.
I really love the new aesthetics of the page. I also really love that the new design is much more minimal compared to the old one (The old one was pretty minimal in the beginning as well, but I added different colors for each heading etc.). I hope that I do not have to say this, but this does not mean that the old Zola theme was bad or something. It was just not for me.
Wrapping it up I can say that I really love my new process of writing posts and my website having a new design.
What do you think of the redesign? Let me know via Matrix!